Bridging the Gap Between Alignment and Function
In the architectural process of re-engineering a smile, aligning crooked teeth into a perfectly straight row is only half of the clinical equation. While archwires and brackets excel at unraveling crowding and adjusting the vertical positioning of individual crowns, they are fundamentally limited to operating within a single jaw at a time. The upper wire straightens the upper teeth; the lower wire straightens the lower teeth.
But what connects the two? How does an orthodontist ensure that the newly straightened upper arch interlocks flawlessly with the lower arch to create a functional, healthy bite?
The answer lies in intermaxillary elastics commonly known by patients as rubber bands for braces.
These small, highly engineered loops of latex (or synthetic polymers) are the primary biomechanical engines used to correct skeletal and dental discrepancies between the upper and lower jaws. Whether resolving a severe overbite, an underbite, or an asymmetrical midline, rubber bands deliver continuous, targeted orthopedic force vectors that guide the jaws and dental arches into perfect harmony.
At Dentovex, we believe that understanding the physics of your treatment significantly boosts compliance and clinical success. In this master guide, we deconstruct the materials science of orthodontic elastics, explore the physics of force vectors and intermaxillary traction, detail the various clinical configurations (Class II, Class III, Box, and Triangle), and provide a definitive protocol for managing your elastic wear for maximum efficiency.
1. Defining the Hardware: Ligatures vs. Power Chains vs. Rubber Bands
Patients often confuse the various elastic components used in orthodontics. To clarify the terminology, it is essential to distinguish between the three primary elastomeric tools:
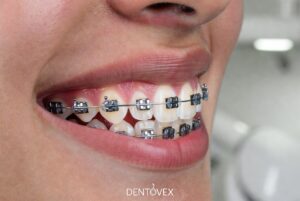
- O-Ring Ligatures: The tiny, individual colored elastic ties placed around each specific bracket. Their sole function is to lock the metal archwire tightly into the bracket slot. They do not connect different teeth together.
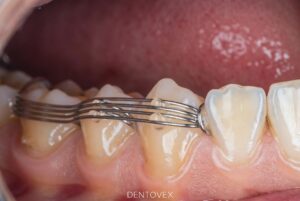
- Power Chain Braces: A continuous, linked row of elastic loops stretched horizontally across multiple brackets on the same arch. Their primary function is to close extraction gaps and consolidate spaces between teeth.
- Intermaxillary Rubber Bands (Elastics): The larger, removable loops that the patient attaches themselves. They hook onto specific bracket hooks, stretching vertically or diagonally between the upper and lower jaws to correct the bite (occlusion).
2. The Physics of Tooth Movement and Intermaxillary Traction
To understand why rubber bands for braces are so critical, we must look at the biomechanics of orthodontic force. Moving teeth requires continuous, controlled mechanical stress applied to the periodontal ligament (PDL).
When a rubber band is stretched between the upper and lower jaws, it operates on the principles of Hooke’s Law of elasticity, which states that the force ($F$) exerted by the elastic is proportional to the distance it is stretched ($F = k \Delta x$).
When you open your mouth to speak or yawn, the bands stretch further, temporarily spiking the kinetic force applied to the anchor teeth. When you close your mouth, the force drops to its baseline holding tension. This dynamic, pulsatile force stimulates the cellular activity within the alveolar bone:
- Osteoclasts dissolve bone on the pressure side of the tooth root.
- Osteoblasts deposit new bone on the tension side of the root.
Dental vs. Skeletal Movement
Rubber bands achieve two distinct types of correction depending on the patient’s age and bone maturity:
- Dental Movement: In adults, where facial sutures are fully fused, rubber bands tilt and slide the teeth themselves along the rigid track of the stainless steel archwire to camouflage a skeletal mismatch.
- Orthopedic (Skeletal) Movement: In growing children and young adolescents, heavy elastic forces can actually modify the growth trajectory of the jawbones, restricting the overgrowth of the upper maxilla or encouraging the forward projection of the lower mandible.
3. Clinical Configurations: Mapping the Elastic Vectors
Because every malocclusion is unique, orthodontists utilize different attachment points (hooks) to create highly specific directional force vectors. Below is a breakdown of the primary clinical configurations:
| Configuration | Hook Placement (Standard) | Clinical Objective | Primary Malocclusion Treated |
| Class II Elastics | Upper Canine to Lower First/Second Molar | Pulls the upper teeth backward and the lower teeth forward. | Overbite / Overjet: When the upper teeth protrude too far ahead of the lower teeth. |
| Class III Elastics | Lower Canine to Upper First/Second Molar | Pulls the lower teeth backward and the upper teeth forward. | Underbite: When the lower jaw protrudes ahead of the upper teeth. |
| Vertical (Box) Elastics | Upper Premolars/Molars straight down to Lower Premolars/Molars | Extrudes (pulls out) the upper and lower back teeth until they meet perfectly in the middle. | Lateral Open Bite: When the back teeth do not touch when the mouth is closed. |
| Anterior Triangle Elastics | Upper Canine down to Lower Canine and Lower Premolar | Extrudes the front teeth vertically to overlap properly. | Anterior Open Bite: Often caused by thumb sucking or tongue thrusting. |
| Cross-Elastics (Midline) | Upper inside (lingual) bracket to Lower outside (buccal) bracket | Applies lateral (side-to-side) force to shift the arches horizontally. | Dental Asymmetry: Correcting a shifted midline or a posterior crossbite. |
Clinical Insight: A patient may wear a Class II configuration on the right side and a Class III configuration on the left side simultaneously. This asymmetrical setup is frequently used to correct a severely deviated midline by rotating the entire lower dental arch like a steering wheel.
4. Materials Science: Latex vs. Synthetic Non-Latex Elastics
Orthodontic elastics are manufactured to exacting tolerances by leading braces manufacturers. They are categorized not just by their physical diameter (e.g., 1/4 inch, 3/16 inch), but by the ounces of force they deliver when stretched to three times their resting diameter (e.g., Light 2.5 oz, Medium 4.5 oz, Heavy 6.5 oz).
The Natural Latex Advantage
The gold standard for orthodontic rubber bands is surgical-grade natural rubber latex. Latex possesses unparalleled elastic memory meaning it can be stretched repeatedly during speaking and eating without permanently deforming or losing its snap.
The Non-Latex Alternative
For patients with a diagnosed latex allergy, manufacturers produce synthetic polymer alternatives (typically medical-grade polyurethane).
- The Clinical Trade-off: While non-latex bands are hypoallergenic and safe, polyurethane undergoes rapid force decay. In the moist, warm environment of the mouth, synthetic bands lose their elastic tension up to 30% faster than natural latex. Consequently, patients using non-latex elastics must change their bands more frequently to maintain optimal continuous force.
5. The Compliance Protocol: How to Wear Your Elastics
The single greatest point of failure in an orthodontic treatment plan is a lack of patient compliance with rubber band wear. Because elastics are removable, the responsibility for this phase of treatment falls entirely on the patient.
To ensure your treatment finishes on schedule, adhere strictly to the following procedural protocol:
1.1. Maintain Continuous Wear:22 hours per day minimum.
Unless instructed otherwise, rubber bands for braces must be worn full-time. This includes sleeping, speaking, and exercising. They should only be removed for eating meals and performing oral hygiene.
2.2. Replace Bands 3 to 4 Times Daily:Combatting force decay.
Never reuse the same rubber band for more than 8-10 hours. As latex absorbs saliva and stretches during the day, it loses its tension. Replace your bands in the morning, after lunch, after dinner, and right before bed to ensure a constant force vector.
3.3. Mirror the Vector Exactly:Hooking mechanics.
Use a mirror or a plastic elastic-placer tool to hook the bands. Ensure you are connecting the exact teeth specified by your orthodontist. Moving the band just one tooth forward or backward alters the entire force vector, pulling your teeth in the wrong direction and severely delaying treatment.
4.4. Never Double the Bands:The ‘doubling up’ myth.
If you miss a day of wear, never put two rubber bands on the same hooks to “catch up.” Doubling the force traumatizes the periodontal ligament, cuts off blood supply to the tooth root (hyalinization), and actually stops tooth movement entirely while risking permanent root resorption.
5.5. Stockpile Your Supply:Travel preparation.
Keep a pack of elastics in your backpack, purse, car, and bathroom. If a band snaps while you are out, it must be replaced immediately. Leaving bands off for just a few hours allows the stretched PDL fibers to pull the teeth back toward their original positions, erasing days of progress.
6. Managing Discomfort and Adaptation
Introducing intermaxillary elastics to your treatment regimen will undoubtedly cause a temporary resurgence of dental soreness. This discomfort is entirely normal and signifies that the cellular remodeling process has been re-initiated in a new direction.
- Muscular Fatigue: Because rubber bands connect the upper and lower jaws, your masseter and temporalis (chewing) muscles must work harder to open your mouth against the resistance. You may experience mild jaw fatigue or TMJ tension for the first 3 to 5 days.
- Tooth Sensitivity: The specific anchor teeth holding the hooks bear the brunt of the elastic force. These teeth will be highly sensitive to biting pressure initially.
- Pain Management: To manage the inflammatory ache, rely on Acetaminophen (Tylenol) rather than NSAIDs (Ibuprofen). As noted in our guide on orthodontic treatment biology, NSAIDs suppress the exact prostaglandins required to facilitate bone remodeling, actively slowing down your progress.
7. Elastic Wear with Clear Aligners
While rubber bands are most heavily associated with traditional metal and transparent teeth braces, they are equally critical for patients utilizing clear aligner therapy.
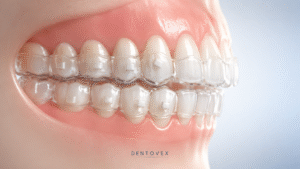
When treating a severe overbite or underbite with invisalign clear aligners, the orthodontist will bond small tooth-colored composite hooks (buttons) directly to the enamel near the gumline, or utilize precision cuts built directly into the plastic trays. The patient then stretches standard rubber bands from the upper aligner to the lower aligner, generating the exact same Class II or Class III force vectors used in fixed braces.
Conclusion: The Engine of the Final Result
Rubber bands for braces are the unassuming heavy lifters of the orthodontic world. While brackets and wires organize the architecture of each individual arch, it is the continuous, dynamic tension of intermaxillary elastics that synchronizes the jaws, optimizes the airway, and perfects the functional bite.
The speed and success of this phase rest squarely in your hands. By committing to strict 22-hour daily wear, changing your bands frequently to combat force decay, and following your orthodontist’s vector instructions flawlessly, you take active control of your treatment accelerating your journey toward a stable, perfectly engineered smile.
Disclaimer: Orthodontic biomechanics vary based on individual skeletal and dental anatomy. Always consult with a licensed orthodontic specialist to ensure you are utilizing the correct elastic force and configuration for your personalized treatment plan.

No responses yet