
Introduction: When a Tooth Refuses to Emerge
Most people associate “impacted teeth” with wisdom teeth—those late-emerging molars that often cause pain and require extraction. However, in the world of orthodontics, there is a far more critical challenge: the impacted canine.
The maxillary canines (the “eyeteeth”) are the second most common teeth to become impacted, following wisdom teeth. But unlike wisdom teeth, canines are essential for a functional bite and a symmetrical smile. They are the cornerstones of your dental arch. When these teeth fail to erupt and remain trapped under the bone or gum tissue, a simple set of braces isn’t enough. It requires a coordinated effort between an oral surgeon and an orthodontist to “rescue” the tooth.
At Dentovex, we understand that hearing your child (or you) has an impacted tooth can be overwhelming. This definitive guide will walk you through the causes, the surgical “expose and bond” procedure, the recovery, and the long-term orthodontic journey to bring that hidden tooth into the light.
1. What Exactly is an Impacted Tooth?
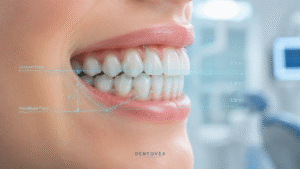
An impacted tooth is simply a tooth that is “stuck” in the jaw and cannot erupt into its proper functional position on its own. While any tooth can become impacted, the upper canines are particularly prone because they are the last of the “front” teeth to erupt, usually around age 11 to 13. By the time they try to come in, the space may already be crowded out by other teeth.
Why Do Teeth Get Impacted?
- Crowding: There simply isn’t enough room in the dental arch for the tooth to fit.
- Extra Teeth: The presence of “supernumerary” (extra) teeth can block the path of the permanent tooth.
- Alignment of the Neighboring Teeth: If the lateral incisors are poorly positioned, they can’t act as a “guide” for the canine to follow.
- Genetics: Sometimes, the tooth is simply tilted at an odd angle within the bone, making natural eruption impossible.
The Consequences of Neglect
Leaving an impacted tooth untreated isn’t just an aesthetic issue. It can lead to:
- Resorption: The impacted tooth can actually “eat away” at the roots of healthy neighboring teeth.
- Cysts: Follicular cysts can form around the trapped tooth, leading to bone loss.
- Infection: Though rare for teeth deep in the bone, partial impactions are highly prone to infection.
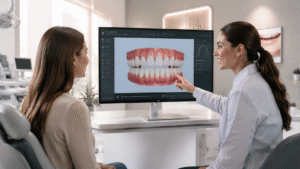
2. The Diagnosis: Beyond the Visual Exam
You cannot diagnose an impacted tooth simply by looking in the mouth. Early detection is key, which is why the American Association of Orthodontists recommends a check-up by age 7.
- Panoramic X-rays: This 2D view provides a broad overview of all teeth, showing their position relative to the jawbone.
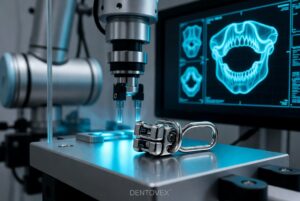
- CBCT (3D Imaging): This is the “gold standard” for impacted teeth. A 3D scan allows the orthodontist to see the exact depth and angle of the tooth—whether it’s on the “palatal” side (roof of the mouth) or the “labial” side (near the lips). This precision is vital for the surgeon to know exactly where to make the incision.
3. The “Expose and Bond” Procedure: A Step-by-Step Breakdown
When a tooth is impacted, the orthodontist cannot reach it. An oral surgeon must perform a minor surgical procedure known as “exposure and bonding.”
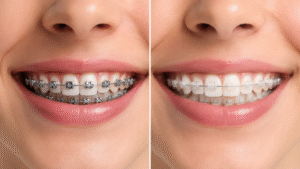
Step 1: Preparing the Arch with Braces
Before surgery, the orthodontist usually places braces on the existing teeth to create a gap. This “parking space” must be ready before the tooth is pulled down.
Step 2: The Surgical Exposure
The surgeon makes a small incision in the gum to uncover the hidden tooth. If the tooth is buried under bone, a small amount of bone is removed to expose the crown of the tooth.
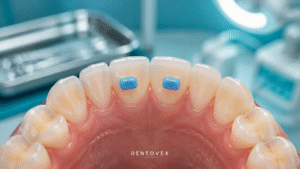
Step 3: Bonding the Attachment
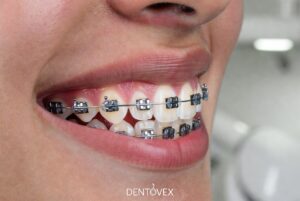
Once the tooth is visible, the surgeon bonds a small orthodontic bracket or a “gold button” to the tooth. Attached to this bracket is a tiny gold chain.
Step 4: Closing the Site
The gum is sutured back into place, with the end of the gold chain left exiting through a small window in the gum or attached to the main orthodontic archwire.
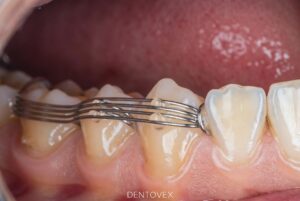
4. The Orthodontic Traction: “The Slow Pull”
After the surgery (usually 1–2 weeks later), the orthodontist begins the “traction” phase. This is the process of using the gold chain to gently guide the tooth into the mouth.
- The Mechanism: The orthodontist applies a light, constant force (using elastics or a specialized wire) to the chain.
- The Timeline: This isn’t an overnight process. Moving a tooth through bone and gum tissue is slow. It can take anywhere from 6 to 12 months just to get the tooth to break through the surface of the gum.
- Adjustments: You will visit the orthodontist every 4–6 weeks to have the tension on the chain adjusted. It is a game of millimeters.
5. Potential Challenges and Risks
While highly successful (over 90% success rate in younger patients), the procedure does have risks:
| Risk | Description | Frequency |
| Ankylosis | The tooth is “fused” to the bone and refuses to move despite traction. | Rare, more common in adults. |
| Root Resorption | The roots of neighboring teeth are damaged during the movement. | Low, minimized by 3D planning. |
| Failure to Erupt | Despite surgery and traction, the tooth stays stuck. | Very low in children/teens. |
The Age Factor: Success rates are significantly higher in teenagers. In adults over 30, the bone is denser and the tooth is more likely to be ankylosed (fused), making the “pulling” process much harder and sometimes impossible.
6. Recovery and Aftercare After Exposure Surgery
The surgery is typically performed under local anesthesia with sedation or general anesthesia.
- The First 48 Hours: Expect minor swelling and some bleeding. Using ice packs on the face is essential.
- Diet: A soft-food diet (yogurt, mashed potatoes, smoothies) is required for about a week to avoid disturbing the surgical site and the newly bonded button.
- Hygiene: You must keep the area clean to prevent infection, but you should not brush directly over the sutures for the first few days. Warm salt water rinses are your best friend during this week.
7. Cost Analysis: What to Expect
Because this involves both an oral surgeon and an orthodontist, the costs are higher than standard braces.
- Orthodontic Fees: Standard braces cost ($3,000–$6,000) plus a surcharge for the complexity of the impacted tooth management.
- Surgical Fees: The “expose and bond” procedure typically costs between $800 and $2,500 per tooth, depending on the depth of the impaction and the type of anesthesia used.
- Imaging Fees: 3D CBCT scans usually cost $200–$500.
Consult our [Orthodontic Cost Comparison 2026] for more detailed financial planning.
Conclusion: Saving the Cornerstone
Saving an impacted canine is a marathon, not a sprint. It requires patience, multiple specialists, and a long-term commitment to oral hygiene. However, the alternative—losing the tooth and requiring a dental implant or living with a permanent gap—is far less desirable.
A successful “exposure and bond” treatment doesn’t just straighten your teeth; it preserves your natural dental anatomy and ensures a stable, healthy bite for the rest of your life. If your orthodontist has identified an impacted tooth, take heart: modern technology makes the rescue of these “hidden gems” more predictable than ever before.
Disclaimer: This guide provides general information about orthodontic exposure. Surgical procedures must be planned and performed by licensed professionals based on your specific clinical needs.

No responses yet